On this post I will continue my E-Wallpaper by creating a background for it.
I've selected a picture of lanterns for my background. Then I did the same thing like before which I selected the whole picture and copied it to the E-Wallpaper project board.


I shall name this layer "Lanterns".

Now this layer has totally blocked the dragon. So all I have to do is just click on the Lantern layer and drag it downwards which will be below the Dragon Dance layer so that the lanterns will look like the background of the dragon.

Now, the picture isn't look very nice because the dragon and the lanterns do share the same colour - Red. In order to make the dragon stand out, I can drop some shadow on it. So I click on the Dragon layer and click on the button below which is the button that indicates "fx" for Add a Layer Style and choose Drop Shadow.

I can adjust the shadow manually so that I can be satisfied with the results. Here are the adjustments I did.

After this, I found out that blurring the background is another good way to let the dragon stand out. So I selected on the Blur Tool to do so. Now the dragon is in front but I want to have a full view of the lanterns. So I just click on the Eyes at the layering menu which will turn the visibility of the dragon off.


After this is done, I think I'll add in an ingot. I've imported a picture with an ingot and used the Quick Selection Tool to highlight the ingot and copied it over to the E-Wallpaper board and named the layer "Ingot".


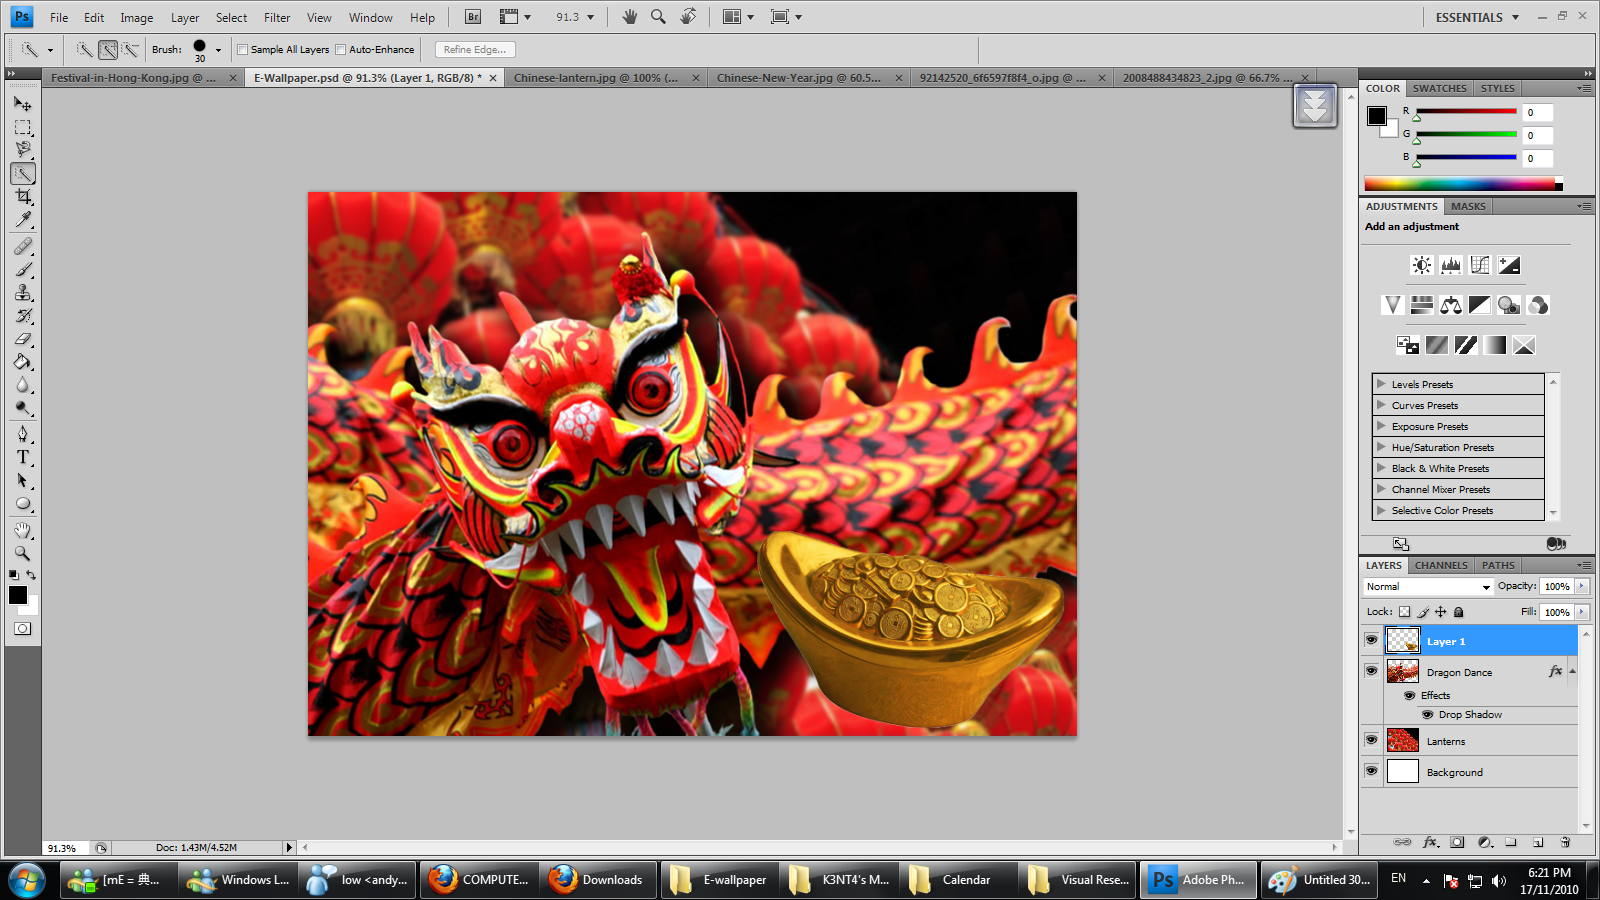

Now I need to make the ingot brighter and shinier. So I click on the Image button and then the Adjustment button, then I select the Brightness and Contrast option.

I drag both the Brightness and Contrast bar to make the ingot shine more.

After editing the ingot, I went on and added in some Ang Pows. I copied the picture over to the board.

Then I clicked on the Add Vector Mask button for masking the Ang Pows. Then I select the Brush Tool and set the foreground to black to mask the Ang Pows. After masking I name this layer "Ang Pows" for specifications.


After the masking the Ang Pows I dragged it to a preferred position and I deleted the background by clicking on the background layer and clicking on the rubbish bin symbol.

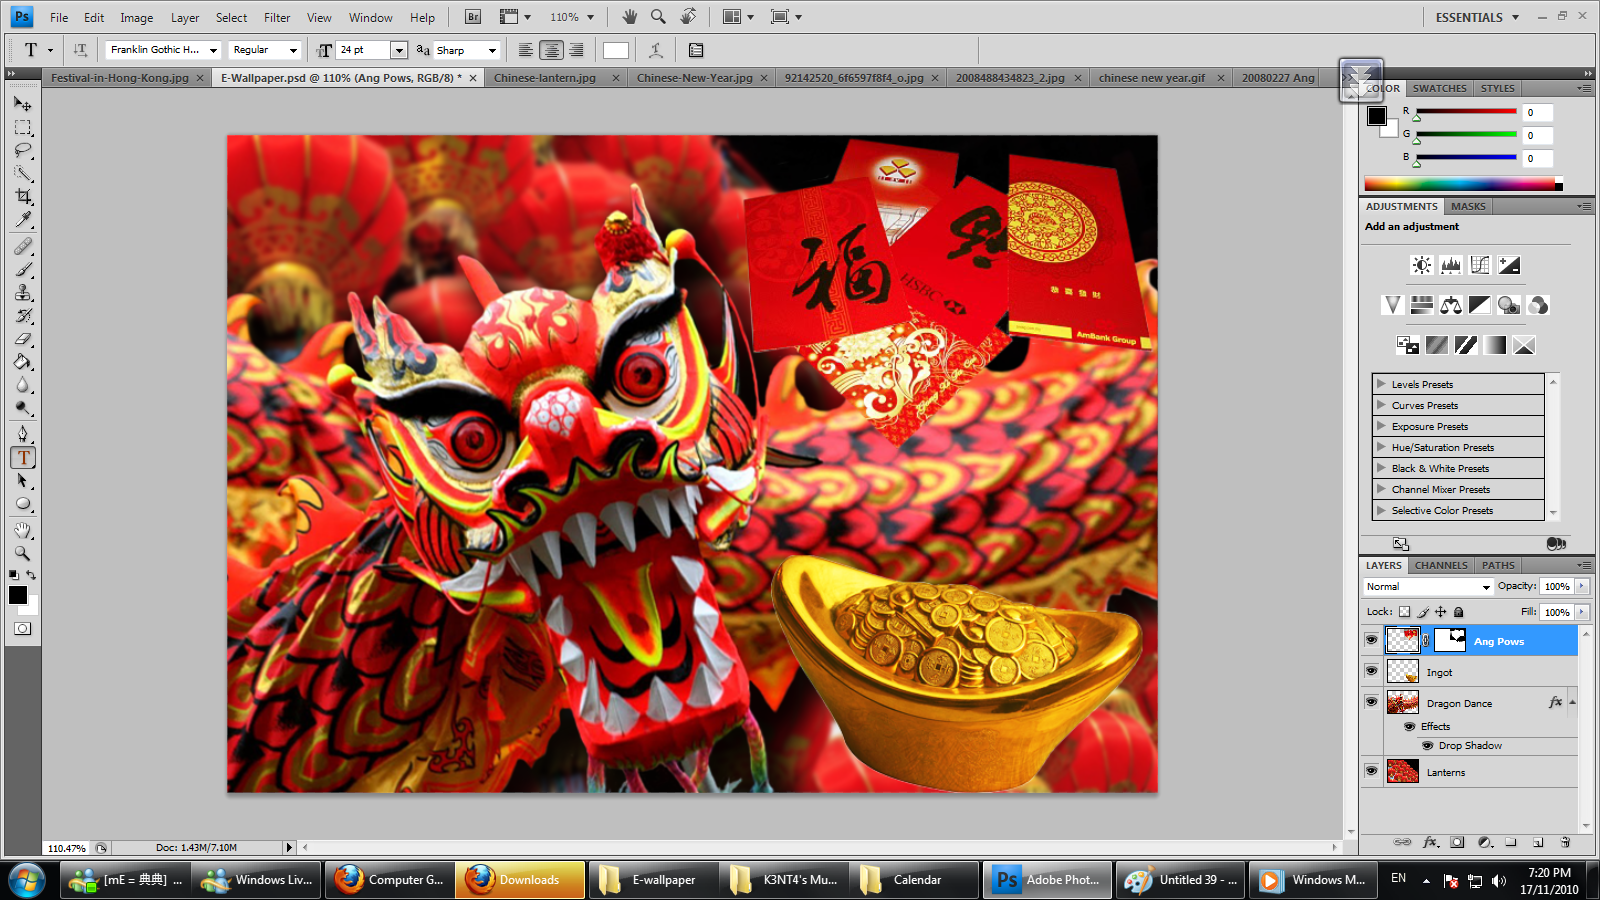
Now it's time to add in some letters. So I pressed the T button which is Type Tool for writting the CHINESE NEW YEAR words. I just click on the picture so that I can start typing. After typing I click on the Tick button for Accept. After that I right-clicked on the layer and select "Resterize Layer". Then I Free-Transformed the words and enlarged the size of the words.


When I'm satisfied I right-clicked on layer again but this time I selected the "Blending Options" and clicked on the "Outer Glow" to make the words stand out with a glow. These are the adjustments below that I made.

But then I looked at the picture again and found that the background is still kind of bright. Maybe it's the red that needs some editing. So I select on the "Lantern" layer again. And I clicked on the Image Button then selected Adjustment and clicked on the "Selective Colours". When the option popped out, I chose red and adjusted the black which could also tune the brightness or the red without affecting other colours much.


With a better background, it's time to add in some Chinese characters. So I did the same thing with the Chinese characters as how I did with the English characters. After that I added my name with the same effect. And I'm all done.


No comments:
Post a Comment